SolidWorks comes with a range of standard library parts but you will find yourself having to create custom parts in situations like structural design projects. This is a step-by-step tutorial showing you how to save a new library part successfully.
1. Create a new part and sketch the profile. Note, the origin is the point at which the profile is located when creating wedments.
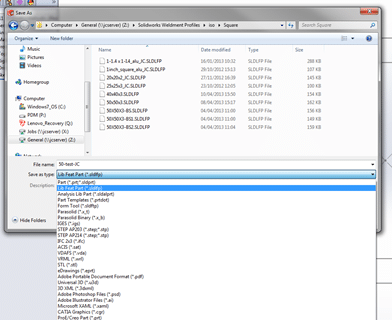
2. Save the part as a ‘library feature/.sldlfp part’ within your SolidWorks profiles directory.
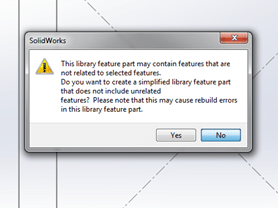
3. A warning may come up regarding reference features. Select ‘No’ to discard the message.
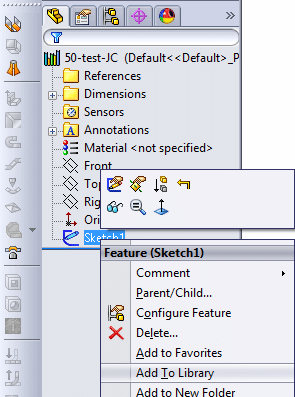
4. Right-click the sketch under the feature manager tree and click ‘Add to library’ and save again.
That’s it! For more tutorials and SolidWorks features explained, be sure to re-visit the Restoric Design blog!


