SolidWorks has standard hole and thread sizes available within, however there may come an occasion where it does not have the size you require. In this case you must add the custom configuration to the SolidWorks hole wizard toolbox…

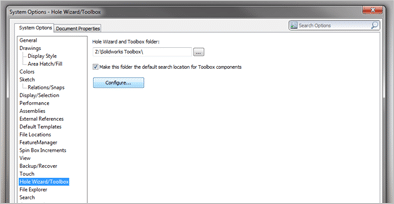
Begin by clicking on Tools > Options > ‘System Options’ > Hole Wizard/Toolbox and click on the box labelled ‘Configure…’

custom-thread-sizes-solidworks-1

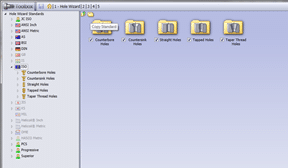
Click on ‘copy standard’ folder icon to make a copy of the relevant standard to edit

custom-thread-sizes-solidworks-2

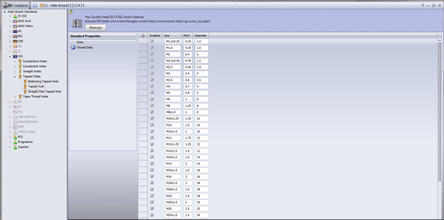
Click on the relevant folder with the type of hole you want to add a custom size to and click on the plus sign to add a new size

                                                               custom-thread-sizes-solidworks-3

Enter the thread data for the same size by clicking on the ‘Thread Data’ properties

 custom-thread-sizes-solidworks-4

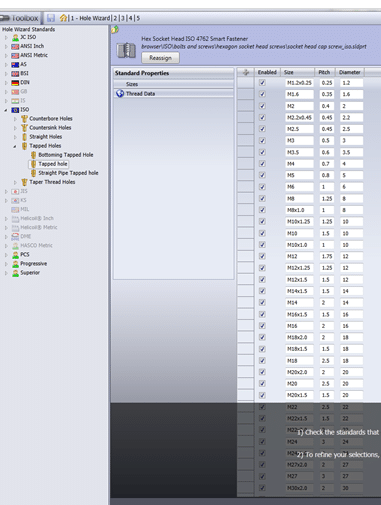
Be sure to click on the save disk icon before returning to SolidWorks. Restoric Design offers CAD design services incorporating the correct design information required when producing components.

Related Articles

What is historic building information modelling?

Meta Description: Learn about the basics of historic building information modelling and how this technology can help with restoration projects. The preservation of historic buildings and structures is a complex and challenging endeavour. To ensure the long-term...

How to make mechanical shop drawings

Shop drawings are an essential part of the mechanical construction process. They offer an intricate design to follow that can be easily understood and executed using the right dimensions and functions, working almost like a language between two engineers to understand...

How to check fabrication drawings

Fabrication drawings are essential in the fabrication industry as they guide all structural construction processes. Accuracy in the drawings is therefore paramount. This article shows you how to check fabrication drawings to ensure they serve their intended purpose...